We are at that time of year when seedlings are starting to sprout and grow. It is a time filled with excitement and anticipation of the season to come. But there is one job that many people get wrong, and getting it wrong can lead to disaster—that job is translating your young seedlings into bigger pots. Continue reading to learn when and how to perform this crucial task.
When to transplant seedlings
The first important step to transplant success is doing it at the correct time. But what is the right time?
You need to look for two crucial markers to know your seedlings are ready to transplant. The development of true leaves and roots going out of the bottom of the existing module or pot.
True Leaves
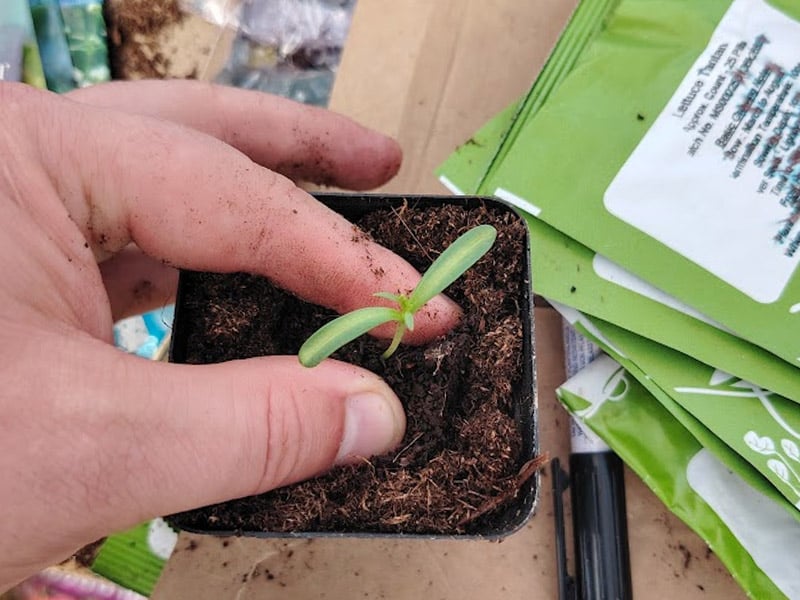
So, what does true leaves actually mean? When seedlings first emerge, they have seed leaves or cotyledons to give them their correct name. These leaves are formed within the seed before sprouting. They are often very similar looking across different plants. Some can have one seed leaf or even none, but the vast majority have two long, thin seed leaves, identical to those of the tomato plant below.

The leaves that follow after these are the "true leaves." They will be shaped like a regular leaf on that particular plant. In the example above, you can see that they look like a standard tomato leaf, whereas the seed leaf is very different.
A set of fully developed true leaves is a good sign that your seedlings are ready for transplanting. But look for the next sign below before moving your seedling.
Roots appearing from the bottom
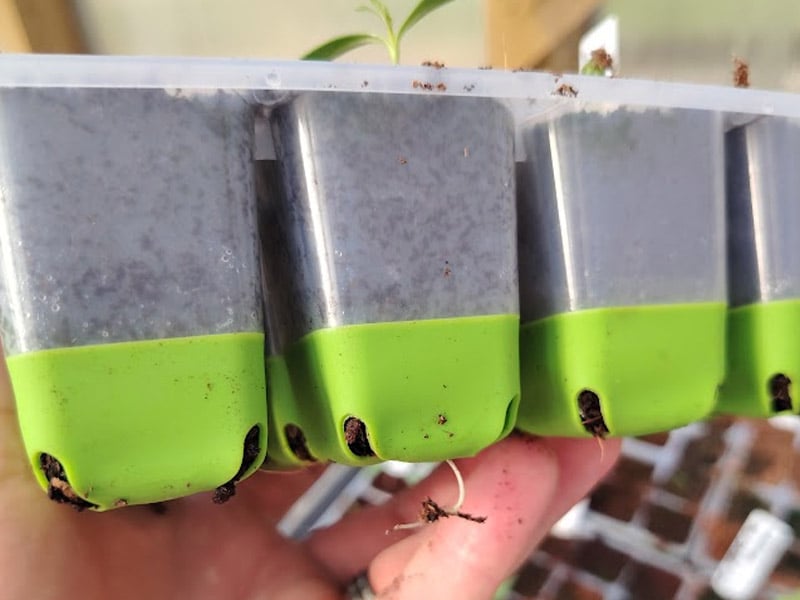
The next clear sign that your seedlings are ready to move on to bigger and better things is the appearance of roots from the bottom of their existing container.
This means they are outgrowing their pots and may need something bigger. The longer you leave them like this, the greater the chance there is that these roots will mat and become damaged when you transplant them, so the sooner the better.
How to transplant seedlings
When moving seedlings, remember to be gentle; they are very delicate and easily damaged.
If possible, avoid handling the seedling itself. Tray and hold onto the soil rather than the plant, so you don't cause any damage.
The first step is to remove the seedling from its pot. This is one reason I love these flexible-bottomed trays - they make this step so easy. Just push up from the bottom and out the plug pops.


This can be more difficult depending on your seed tray or module. If they won't push up simply like this, then try to lever the seedling out rather than pull.
I like to use an old seed label and slide it down the side of the tray, and then lever up, trying to get under the plant and lever it out.
Planting On
Now, we need to plant the seedling in its next container. Don't jump on too many at once, as this can cause issues with some seedlings. Try to find a nice middle ground where it has room to grow but isn't going into a vast pot too early.
Also, remember that some seedlings will grow a lot quicker than others. Vigorous growers, such as any member of the cucurbit family (cucumbers, squash, pumpkins, etc.), will germinate as already large plants and can therefore be planted in a larger pot straight away.
I use regular multi-purpose compost and make a large hole in the middle where I can slide the existing plug into.
If your seedlings are a little long and leggy, then you can often plant them deeper than they were in their last pot.

I then slide the seedling in and firm it in well. Again, be careful to avoid touching the surface and just press the soil in.
Cover the top with fresh compost and water well, and you are done!
